This manual aims to instruct newcomers in the principles of spray painting. It gives you all the knowledge you require to attempt your first project.
Principles
- We’ll explain the inner workings of a can to you from scratch so that you understand the very foundations of what you’re dealing with. Understanding how a can works can extend its life and eventually help you save money. Before using a can, it’s crucial to understand that it includes a variety of contents that will separate as they rest. The can must be vigorously shaken for at least a minute or two in order to remix the contents and make them usable once more. The results of skipping this phase can and will be unsatisfactory, including blotchy finishes, wasted paint and propellant, unwanted splatter, and other unfavourable outcomes.
- It is crucial to consider the type of surface you will be putting paint on before starting a new job. Many different types of spray paint are available, including many basecoat alternatives called primers, each one suitable for a particular use. Primers are typically only necessary for porous surfaces like concrete, wood, and plastics if a significant colour shift is desired (black to white etc.) The sole purpose of a primer is to produce a basecoat that covers minor, typically undetectable divots, and crevasses on a surface. This significantly enhances the final product, especially when painting wood because it may take several coats of paint to completely cover the wood grain and provide an even colour without primer.Additionally, a thin layer of paint will still be water permeable if the wood is exposed to moisture, leading to deformed portions, mildew, and dry rot. For plastics, Styrofoam, metal, and other surfaces, Montana offers a primer in a spray range that enhances the waterproofing properties of the paint. If used properly, 400 ml of paint can typically cover 8 to 10 square feet of a non-porous surface.
- The cap that comes with each can of spray paint is another crucial consideration when utilizing it. There are variations in every cap’s width and softness. Depending on how far away from your project you are, each range has a standard cap that generates an average spray width of between.4″ and 1″. The pace at which paint departs the can is particularly high when employing wider caps, especially with a high-pressure can, and they will consequently last far shorter than skinnier caps.
A Pro Tip
To get a better concept of the outcome, it is usually a good idea to develop a sample patch before starting your project. Additionally, it helps a first-time user understand how they can works.
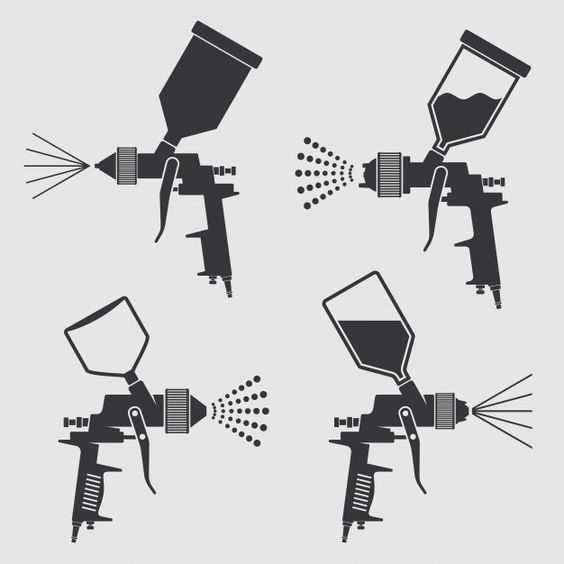
Caps & Nozzels
The professionals have created this succinct reference to caps and nozzles to show you how to utilize Montana spray paints in a variety of ways. Each hat has its own special abilities, from drawing fine lines and exquisite details to quickly covering enormous surfaces.
Please be aware that depending on your proximity to the target surface, the thickness of a line emitted from any of the caps below will change. Since the can head is shaped like a cone, the closer you stand, the finer your line will be, and vice versa. Click here to see our full guide on different cap types and which is best for the work you are doing.
Technique
This technique guide will go over the dos and don’ts of spray paint application.
So it’s crucial to keep in mind that a good approach is necessary for consistent outcomes whether you’re working with walls, furniture, or automobiles. Below are our top five suggestions.
- The first mistake individuals make while spray painting is typically one of the most disregarded beginner’s procedures. Spray bottles are not cameras. Avoid aiming and shooting. Sweep the paint can past the object both horizontally and vertically as you spray it to get a uniform coating. You might start spraying to the left of the object, onto the object, and then to the right of the object, for instance, if you’re travelling from left to right.
- The highlights on a throw up or the nooks of a lamp or ornament are two examples of details that are frequently depicted with thin lines. The line will be smaller the closer the can is to the target. While tilting the can around 45 degrees to achieve the shortest distance between you and your project, we advise utilizing the Montana outline cap, which employs a thin, plastic straw for accuracy. To prevent unwelcome leakage, very fine lines need to be applied very quickly.
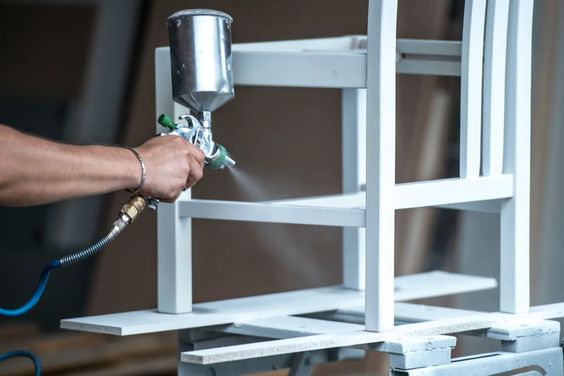
- Large sections should be filled in efficiently to extend the life of the can and, more significantly, to produce a professional finish by eliminating thick layers that could flake and peel when exposed to the outdoors. The illustration below demonstrates efficient fill painting techniques.
- Gradients require practice, as do all of the techniques demonstrated, because various brands, cans, nozzles, and types of paint will respond in somewhat different ways. Generally, you want to rotate the can to acquire the desired gradient width after aiming it at your project so it is parallel. The gradient’s coverage will be greater the further you rotate away from the surface.
- For beginners, small dots might also be a hassle, but as they say, practice makes perfect. Spray while holding the can upside-down and simulate blowing the cap clean. Stop spraying when just propellant is coming out of the can instead of paint. Press down on the cap of the can while it is still upside down to spray a precise dot. Before putting this approach into use, practice it frequently. The secret is to spray once, wait for the appropriate moment to pause, and then spray one more to make a dot. Again, the output from various nozzles will vary.
Pro Tip
Wearing old clothes that you don’t mind getting dirty will help protect your hands from paint, and make sure all of your paint cans are the same brand when you go shopping.
Precautions
When working on your project, it’s crucial to use spray paint correctly and to protect yourself.
- Making ensuring your workspace is appropriately ventilated is the first step. The easiest method to achieve this is ideally outside, but if that’s not an option, make sure you have sufficient ventilation when painting indoors by using a fan or opening windows and doors.
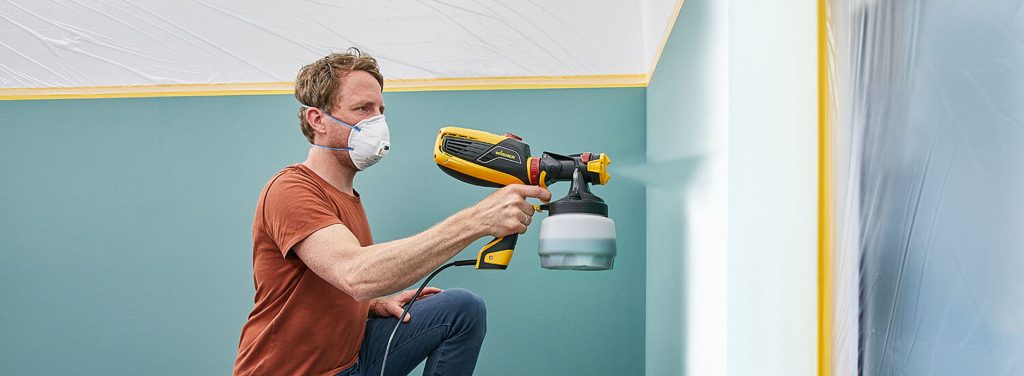
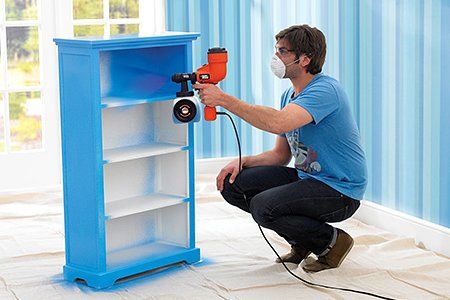
- A professional respirator, like the one pictured above, can be purchased for less than €32 and can offer safety and protection, especially for extended periods of time. While a regular dust mask has little to no effect on the prevention of inhaling harmful vapours. Your mouth and nose should be covered by an effective mask. It ought to have a minimum of two filters. The outside filter, often known as a “dust filter,” typically consists of a paper-based filter enclosed in plastic. The exterior filter prevents you from breathing in the dusty paint mist particles. The “gas filter” on the inside often consists of a coal-based substance enclosed in a metal case.
- Wearing protective gloves can save you time by avoiding the need to wash paint off your hands and fingers, while it is not a necessary step. If you’re not careful, spray paint, which is frequently highly thick, can go under your nails. Due to the highly pigmented composition of Montana paint, it is particularly difficult to remove.
- Another vital safety measure you should take is to always wear safety eyewear, but especially when painting inside. Spray paint contains a variety of harsh chemicals, and extended exposure to these can occasionally result in long-term eye problems and, in severe circumstances, blindness.
- The value of a big sheet or rag to assist capture the extra paint particles that fly around while using a can is an important tip to keep in mind. When using spray paint, it often spreads everywhere. Nine times out of ten, you’ll find that the paint has settled shockingly far from your project, so make sure there is an old drop cloth nearby to catch it.
- Setting up your project at about waist or chest level will make it easier for you to accomplish it, but more importantly, it can help you avoid posture and back problems that might develop from constantly hunching over. Use bungee cords to suspend a bike frame at a respectable level, for instance, if you are painting it.
Effects & Finishes
Numerous specialized paint finishes, and effects are available. Any project can benefit from the effects range’s additional creative dimension, such as the marble or granite sprays. The Whiteout and Blackout sprays are ideal for producing the darkest blacks and the whitest whites since they are extremely thick and covering.
Start Your Craft
This quick guide is meant to enlighten folks who aren’t familiar with the advantages of spray paint about the various benefits these tiny cans have.
Spray paint is now a favourite among painters, crafters, hobbyists, and up cycling due to the quick and durable results. In the past, it was only used to adorn train cars and public structures. Here are a few projects that have been spray painted.
We have a few simple projects that are perfect for individuals who are just learning to spray paint, starting at the simpler end of the spectrum. These projects should be simple for anyone to complete, whether they have never used spray paint before or are seasoned pros.
1. In Minutes, revive a lampshade.
Use masking tape to tape off any components of a lampshade, like the one below, that you want to leave alone, like wiring and fixtures. Additionally, since painting the interior of the lampshade a different colour may change how the light bounces off of it, you might want to totally mask it off to maintain it white (and ultimately change the ambience of a room). After masking off the required regions, centre the lamp in the preparation area and use horizontal strokes to evenly cover the preparation area with your chosen colour, letting go after each stroke. Even outcomes will be obtained by employing these brief, regular bursts. Using erratic, multi-directional strokes can have unintended consequences.
It is important to note that coloured lampshades, particularly those in darker tones, sometimes require two or three layers to completely block out light. For instance, if you want to paint a black lampshade white, you’ll need to apply at least a few basecoats before the final colour. Additionally, some experts advise placing a primer on metal, however, this is typically unnecessary if the lampshade will be used inside and isn’t a really dark colour (black, purple, etc.). Make sure the paint has dried before moving on because drying durations can vary depending on the surface.
2. Add Some Style To Any Vase
If you have a vase laying around that hasn’t been used in a while, give it fresh life with some masking tape and spray paint. First, use the masking tape to design the pattern you want, such as horizontal or vertical stripes, keeping in mind that the paint will only adhere to the portions that are visible (it is usually a good idea to cover the top of the vase to avoid unwanted spray inside).
Place the vase in the middle of the prep area once you are happy with the masking job. Using your spray paint, apply even coatings on the vase in horizontal strokes, making sure to keep the can moving as you work. Spraying the same area for even a fraction of a second too long might produce undesirable effects like unwanted drips. Peel off the masking tape slowly to expose the finished product after allowing the suggested drying time. Your vase should now have a set of striking, hand-painted stripes if everything was done correctly (or whatever pattern you decided to go with.)
3. Utilize Dated Biscuit Tins in New Ways
We’ll need two cans of spray paint, thin tape, and practically any art supply store you can find to make a tin with a checked pattern on the lid. To stop paint from getting inside the main compartment of the base, first remove the lid and set it aside. Then, cover the compartment with masking tape.
Once the area has been blocked off, place the base in the middle of the preparation zone upside down so the bottom is exposed. Then, using your chosen colour, evenly apply horizontal strokes to the base, setting it aside to dry. To prevent imperfections, we put a basecoat to our lid and let it cure for a few hours before adding any masking tape.
Once dry, use a ruler or the tape itself to evenly apply the masking tape. When you are satisfied with the first layer of stripes, add the second layer, making sure that the stripes are exactly perpendicular to the previous set to create perfect squares. Once you are satisfied with how the second layer of stripes is positioned, apply horizontal strokes from top to bottom, making sure there is an even coat throughout, and allow to dry.